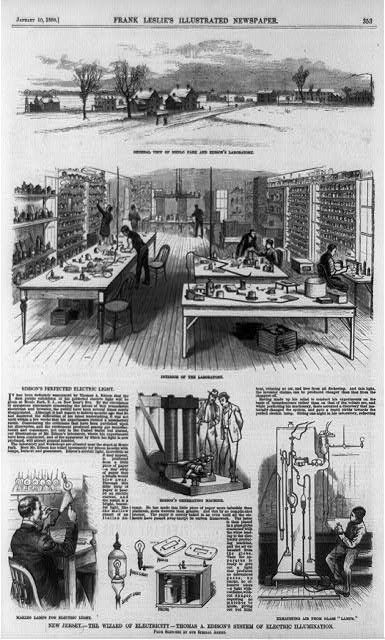
What do the Apollo missions and lean software development have in common?

CAPCOM Charles Duke (left), with backup crewmen Jim Lovell and Fred Haise listening in during Apollo 11’s descent

Ever wondered why it was apollo 11 that landed on the moon and not apollo 1? after all this was the first time humans had attempted to land on the moon.
This project had unlimited funds and so the Apollo team were able to run the project in incremental stages and then iterate, in other words the lean approach by testing and learning from each stage before moving onto the next stage towards the journey to ultimately land on the moon.

Of course most big projects do not have unlimited funding like this. Cost is prohibitive, Building a skyscraper or hosting the Olympic games on the other hand would just be too costly. Building a skyscraper multiple times before discovering the correct way would blow the contruction budget. Hosting mock Olympic games would likewise make the whole endeavour too costly for cities to host.

Luckily this approach works well in software where it’s relatively cheap to iterate and try out ideas and then change what has been built and try again. Unfortunately is still far too common to see software projects as contruction projects where this discovery phase is completely missed.

Inspired by the book How Big Things Get Done: The Surprising Factors That Determine the Fate of Every Project, from Home Renovations to Space Exploration and Everything in Between by Bent Flyvbjerg and Dan Gardner

The TDD approach for installing a security camera

Can TDD also be used outside developing software?

As an exercise I’d like to see if installing a security camera can be helped by using a TDD approach.

Considering the patterns defined by Kent Beck in Test-Driven Development by Example:

Test List

Write a list of all the tests you know you will have to write

  • Should notify when a person is detected in front of house
  • Should not notify if an animal or other motion is detected
  • Should not trigger for person seen on street
  • Should send notification to my phone even when sleep mode is active
  • Should record video of person when detected for watching later

Isolate the system under test

It should be possible to run tests on the camera before having it fully installed and mounted on a wall

  • Use battery over mains power as:
    • Harder to ‘mock out’ mains power
    • Can test camera works before wiring in place
    • Can experiment and gain rapid feedback on camera positioning

This then indicated features I need in a security camera and what features are not required

Must have

  • Battery powered (easier to test positioning that wired camera)
  • Person detection (should not send false alarms)

Do not need

  • Audible alarm (would be too anoying for neighbours when someone we know walks by)

Test First

To improve the design

By considering all places an intruder could be, this forces me to place the camera in an optimal position and allows me to try out different positions e.g. high up on the garage roof or above the porch without having to commit to installing a power point.

To control scope

By thinking about the tests first I’m forced to consider what the camera should cover

  • Should the camera sense motion on the street? – No too many false alarms, so either reposition camera or use zone
  • Should the camera notify when I am at home and out? – Yes
  • Should a siren sound when a person is detected? No, would be very anoying for neighbours if triggerred when false alarm

Assert first

Start with what you want to test and work backwards.

  • I should get notification on my phone – does the camera phone app actually support notifications from camera events?
  • Only notify for person events rather than general motion (which would be false alarms outside e.g. tree swaying)

Test data

Consider what test data to use

  • An intruder by day (we should add this to our test list)
  • An intruder by night (we should also add this to our test list)
  • An insect buzzing around the camera (we should also add this to our test list)

Write a failing test first

Some test algorithms which can be tested before the camera is mounted. Simply provide battery power to the camera and try out the following test scenarios. This also means we get to try the camera is working correctly before rather than after installing.


Should send event if person detected

Point camera at a person
Result: fail

Enable people detection on camera app
Result: pass

Should not send phone notification if just motion detected

Enable motion under events

Result: fail (motion is detected)

Disable motion under events

Result: pass (general motion is no longer detected)

Should send phone notification
Result: fail

Enable push notifications

Result: pass

Life 3.0 by Max Tegmark

With the outbreak of generative A.I. instigated by ChatGPT and now hurredly being followed up by the tech behmoths like Microsoft and Google, I thought it I’d recomend a great read on the subject of AI.

“Life 3.0: Being Human in the Age of Artificial Intelligence” by Max Tegmark explores the potential implications and challenges of advancing artificial intelligence (AI) technologies.

Why Life 3.0 ?

Four billion or so years ago, life on earth began at version 1.0. It relied on random mutation to adapt to it’s environment. Next came life 2.0 which had software instead of a hard wired brain which gave the advantage of allowing adaptation in real time, in other words, learning.

Next is life 3.0, where both the hardware (body) and software (brain) can be changed at will. No longer trapped in an ageing body A.I. will be able to live forever and re-progam it’s brain to acheive unimaginable growth beyond our understanding.

Life versionBodyBrainExample
1.0Changes by evolutionChanges by evolutionBacteria
2.0 Changes by evolution Changes by designHuman
3.0 Changes by design Changes by design AI

In his book Superintelligence, Nick Bostrom describes the human brain running at a top speed of about 200 Hz, which is seven orders of magnitude slower than a modest silicon based processing unit running at 2 GHz. Moreover neurons transmit signals at a maximum of 120 m/s whereas silicon units transmit at the speed of light. The brain compensates for it’s slow clock speed by running in massive parrellelisation.

Life 3.0 can upgrade it’s faster hardware even further and maybe able to eventually mimic the parrellel processing abilities of the brain resulting in a mind milliions of times faster than a human.

Reference

Rockets as a Service

NASA is about to launch it’s most powerful rocket ever, the Space Launch System (SLS) on it’s maiden voyage around the moon any day now. Cobbled together from old Space Shuttle parts it’s taken 11 years and $4 billion of tax payer’s money to build. The SLS, like the previous giant Saturn 5 rocket before it, is not reusable.

Meanwhile privately funded company SpaceX has been working away on it’s giant Starship rocket which is totally reusable.

Both these rockets are designed to do the same job, get astronauts to the moon. But what’s interesting is the processes that brought them to life.

It was thought by using old Space Shuttle parts the SLS would be cheaper to develop, in fact, it’s the opposite which has shown to be true. NASA’s public funding model has had a very undesirable effect. The requirement from congress to provide jobs through contracts to American companies means that delivery is incentivised to take longer and therefore at a higher cost.

Fortunately, as a result of the Obama government, NASA did provide funding for private space companies to take up the challenge and this has resulted in SpaceX being able to develop Starship which competes directly with the SLS but for a fraction of the cost.

The SLS seems to have been a very costly insurance project, just in case the privately funded space companies did not rise to the challenge. But I can’t help thinking what else could NASA have built with $4 billion? Maybe something akin to amazing scientific research projects like the James Web Telescope.

At the end of the day these rockets are really just infrastructure, a way to get payloads up into low earth orbit and eventually the moon, they require iteration, experimentation, an agile mindset and above all, an ability to embrace failure. This is where competition and innovation shine and what SpaceX has in spades. This is in stark contrast to NASA’s compliance driven, risk averse, bureacratic culture. No longer driven by the mission, a far cry from the NASA of 1969 and the first moon landings.

NASA’s SLS versus SpaceX’s Starship

SLSStarship
Cost per launch$4.1 billion$2 million
Cost to the tax payer$11 billion$1 billion
Launches per year4100
Payload95 tonnes150 tonnes

Azure YAML Pipelines – Exclude NPM development dependencies from supply chain security scans

If you’re using tools like Checkmarx or JFrog Xray to scan for security vulnerabilities in your third party dependencies in your NPM builds then you may have noticed that they can highlight a lot of security vulnerabilities that come from development only dependencies.

If you’re producing a shared NPM library or service there is no need for your development dependencies to be included in the final package and to acheive this you have to pass the –only=production flag.

This will save a lot of time as security scans will only consider production dependencies.

Example – Using JFrog Xray on Azure Pipelines

Here is the complete code snippet to install only development dependencies, pack and publish the artifact, collect the build-info (for Xray) and then perform a Xray scan of the build.

  parameters:
  - name: artifactoryServiceConnection
    type: string
    default: 'sample-pipeline-service'
  - name: buildSourceRepo
    type: string
    default: 'npm-remote'
  - name: artifactoryBuildname
    type: string  
    default: 'focused-xray-test'
  - name: buildVersion
    type: string  
    default: '24'

steps:
- task: ArtifactoryNpm@2
  inputs:
    command: 'ci'
    artifactoryService: ${{ parameters.artifactoryServiceConnection }}
    sourceRepo: ${{ parameters.buildSourceRepo }}
    collectBuildInfo: true
    threads: 1
    buildName: ${{ parameters.artifactoryBuildname }}
    buildNumber: ${{ parameters.buildVersion }}
    includeEnvVars: true
    arguments: '--only=production'
- task: ArtifactoryNpm@2
  inputs:
    command: 'pack and publish'
    artifactoryService: ${{ parameters.artifactoryServiceConnection }}
    targetRepo: 'samplenpmlib-npm-library-build-local'
    collectBuildInfo: true
    buildName: ${{ parameters.artifactoryBuildname }}
    buildNumber: ${{ parameters.buildVersion }}
    includeEnvVars: true
- task: ArtifactoryPublishBuildInfo@1
  displayName: 'Publishing buildInfo to Artifactory'
  inputs:
    artifactoryService: ${{ parameters.artifactoryServiceConnection }}
    buildName: ${{ parameters.artifactoryBuildname }}
    buildNumber: ${{ parameters.buildVersion }}
- task: ArtifactoryXrayScan@1
  displayName: 'Scanning build with Jfrog XRay'
  inputs:
    allowFailBuild: true
    artifactoryService: ${{ parameters.artifactoryServiceConnection }}
    buildName: ${{ parameters.artifactoryBuildname }}
    buildNumber: ${{ parameters.buildVersion }} 

Azure DevOps YAML Pipelines – deploy to on-premise targets using Environments

Deployment from the Azure DevOps cloud service to on-premise servers can be done in either a pull or push setup. Usually I’ve found the pull approach most suitable as it easily scales to multiple target machines in each environment and does require the pipeline deployment job itself to know about each server. (Server in this case can be a VM or actual physical server)

Using YAML pipelines (preferred over the classic release GUI pipelines) we can implement pull deployments using Environments. Basically each Environment is configured within Azure Pipelines and target servers are added. Each target server requires an agent to be running on it to communicate back to the deployment job in Azure Pipelines. So this makes each of your target servers not only run your application but also the run deployment (via the installed agent)

Tags allow you to differentiate between server types or roles such as web, app, database or primary and secondary regions. This is useful when you configure your jobs in the pipeline so certain jobs will run against certain targets.

One good thing about Environmentsis that they are not part of limit for parrallel agents

Security Considerations

  • The agent talks to Azure DevOps over port 443 which means that you can have pretty strong rules on inbound traffic to the server, as only outbound traffic over 443 is required for the agent to work.
  • Compromised agent software will have direct, on machine access to all servers including production

Application Config – Options and when to use

What to avoid

  • Having a variation of an application for each environment. A single artifact should be built once and then deployed to all environments otherwise you can’t guarantee that each variation has been tested.
  • Having to re-build and re-deploy the artifact if changes are required in it’s environmental configuration, for same reason as above.
  • Have secrets mixed in with your non-secret environment config (or anywhere in source code for that matter).

Consider Separation of Concerns

Consider who is going to make changes to the config, both secret and non secret.

Roles

RoleWhat
DevelopersTestersResponsible for the schema of the configuration:Need to know the keys NOT the values across environments 
OperationsSecurityResponsible for the life cycle of the configuration e.g.CRUDRenew expiring secretsEnsure securityNeed to set the values as they are the ones who create these for each environment

Where to Store

The 12 factor app says you should have config separate from application source code. Mixing environment config in with the application source code presents some problems:

  • Infrastructure team have to modify application source code to update values (or pass values to Developers)
  • Resource names are potentially sensitive information that might help a hacker to gain access to systems
  • Infrastructure would need to modify multiple app configs if those apps are deployed to a single service e.g. K8s cluster. Whereas if config is obtained by the service runtime this only has to be done once
StorageWhatRole
Configuration StoreStores environment specific values for the application but does not contain sensitive informationDoes not require encryptionAccess by general operations
Secret StoreSensitive configuration valuesConnection stringsCertificatesAccess tokensEach application should have it’s own scopeAccess restricted to elevated operational roles

Consider how config changes get into production

By accessing the config at runtime you avoid having to rebuild and redeploy app when config changes

TechniqueRequired to make config change live
Config store accessed at runtime e.g. Azure App Configuration accessed by SDKApp picks up while running  
Config store accessed at build timee.g. Config file in with source code.A file for each environment e.g. appsettings.json, appsettings-dev.json, appsettings-test.jsonRebuild and redeploy the app  
Config store accessed at deploy time e.g. HelmRedeploy the app  

Why use config store?

  • Allows config to be centrally stored so easier to debug problems and compare config across related services
  • Supports hierarchies of config parameters
  • Control feature availability in real-time through feature flags

Slow CICD Pipeline? Try These Techniques

Running buddies

Identify the long running stages that don’t need to run sequentially. For example you may run static code analysers, a Sonar code quality scan and also a Checkmarx cxSAST security scan. These can be run independently and so are good candidates to run at the same time. They also tend to take a few minutes which is generally longer than most other build tasks.

Azure Pipelines allows stages to be run in parallel by simply not specifying a dependsOn to indicate dependent jobs

jobs:
- job: Windows
  pool:
    vmImage: 'vs2017-win2016'
  steps:
  - script: echo hello from Windows
- job: macOS
  pool:
    vmImage: 'macOS-10.14'
  steps:
  - script: echo hello from macOS
- job: Linux
  pool:
    vmImage: 'ubuntu-16.04'
  steps:
  - script: echo hello from Linux

https://docs.microsoft.com/en-us/azure/devops/pipelines/process/phases?view=azure-devops&tabs=yaml

Quick feature builds, Full Pull Request builds

Rather than run all your build tasks for all branches including feature branches, think about moving longer running tasks to only execute on pull request builds. For example you could move the Sonar code quality scan to only run when merging to master through a pull request. The downside to this is that developers are getting the feedback slightly later in the cycle but one way to mitigate this is to run SonarLint within your IDE to get feedback as you code. https://www.sonarqube.org/sonarlint/

Cache

Downloading dependencies can be bandwidth intensive and time consuming. By caching the third party packages that are needed for your build you can avoid the cost of downloading each time. This is especially important if you use disposable agents that are thrown away after executing their build stage.

Azure Pipelines also supports caching across multiple pipeline runs.

https://docs.microsoft.com/en-us/azure/devops/pipelines/release/caching?view=azure-devops

Call my Agent

Check how many agents you have available to run pipeline tasks. If you are running tasks in parallel you will need multiple agents per pipeline. Check the queued tasks and consider increasing the number of available agents if you see tasks are waiting for others to complete.

Azure Pipelines NuGet Monorepo

This post shows how to structure a monorepo for NuGet packages and then automate their build using Azure YAML pipelines.

Project Structure

Use a package’s solution file to define the location of the packages source code and test code. This single solution file can then be passed to the DotNetCoreCLI@2 task to only build and pack that particular package.

Solution files are Common.A.sln and Common.B.sln.

Project file structure for two packages common.A and common.B

/common-nuget-library
   /common
     /common.A
       azure-pipelines.yml
       common.A.sln
       common.A.csproj
       /src
     /common.B  
       azure-pipelines.yml
       common.B.sln
       common.B.csproj
       /src
   /tests  
     common.A.tests
       common.A.tests.csproj
     common.B.tests
       common.B.tests.csproj

Configuring the pipeline for each NuGet package

Next we want to configure a pipeline for each package. The contents of each azure-pipelines.yml are show below.

common.A/azure-pipelines.yml

trigger:
  paths:
    include:
      - common/common.A/*
...
- task: DotNetCoreCLI@2
  displayName: 'DotNet Build'
  inputs:
    command: 'build'
    projects: 'common/common.A/common.A.sln'
- task: DotNetCoreCLI@2
  displayName: 'Dotnet Pack'
  inputs:
    command: 'pack'
    packagesToPack: 'common/common.A/common.A.sln'
    includesymbols: true
    packDirectory: '$(Pipeline.Workspace)/dist'
    configuration: 'Release'
    nobuild: true
    versionEnvVar: 'BUILD_BUILDNUMBER'
    versioningScheme: 'byEnvVar'
    buildProperties: 'SymbolPackageFormat=snupkg'
  • The pipeline is only triggered when changes occur in common/common.A/*
  • The DotNet Build task only builds the packages listed in the solution file ‘common/common.A/common.A.sln’
  • The DotNet pack task only packages ‘common/common.A/common.A.sln’

common.B/azure-pipelines.yml

trigger:
  paths:
    include:
      - common/common.B/*
...
- task: DotNetCoreCLI@2
  displayName: 'DotNet Build'
  inputs:
    command: 'build'
    projects: 'common/common.B/common.B.sln'      
- task: DotNetCoreCLI@2
  displayName: 'Dotnet Pack'
  inputs:
    command: 'pack'
    packagesToPack: 'common/common.B/common.B.sln'
    includesymbols: true
    packDirectory: '$(Pipeline.Workspace)/dist'
    configuration: 'Release'
    nobuild: true
    versionEnvVar: 'BUILD_BUILDNUMBER'
    versioningScheme: 'byEnvVar'
    buildProperties: 'SymbolPackageFormat=snupkg'    
  • The pipeline is only triggered when changes occur in common/common.B/*
  • The DotNet Build task only builds the packages listed in the solution file ‘common/common.B/common.B.sln’
  • The DotNet pack task only packages ‘common/common.B/common.B.sln’

Create a pipeline for each package

Finally you can create a pipeline to build each package by simply selecting ‘New pipeline’ from the Pipelines tab and providing the the azure-pipelines.yml file for that package.